Archive for the ‘Articles’ Category

Video: Wrap Your Refridgerator in 3M Carbon Fiber DI-NOC Vinyl

We love to see 3M’s DI-NOC carbon fiber vinyl being used outside of just the automotive world. Things like prototyping, architectural design, technology, refinishing products, and more. The applications for the vinyl are literally unlimited. In the below video we guide you through the steps to wrap a refridgerator in the vinyl, giving it a completely different look than before. While the fridge we used already looked new, imagine taking one that is starting to look outdated, but works just fine. Using the vinyl, you can give it life once again and save money while giving it an updated look.\r\n\r\n

\r\n\r\nIf you have anything unique that you’ve used 3M’s DI-NOC for, let us know!  We’re always looking for the latest and greatest uses.

Using DI-NOC To Make You Money: iPhone 4 Carbon Fiber DI-NOC Bumpers

This isn’t the first time we’ve posted about a customer of ours using carbon fiber DI-NOC to create their own business.  In the past we’ve written about DI-NOC cufflinks, and today we’ve got CarbonBumper.com.  While we supply them with raw material, they then go out and manufacture a custom cut bumper for the iPhone 4 made out of 3M carbon fiber DI-NOC material.  The DIY kits are computer cut and accurate to the 1/1000th of an inch which will ensure that it installs perfectly.\r\n

Apple iPhone 4 carbon fiber 3M DI-NOC bumper

\r\nBecause DI-NOC material goes on dry, it’s extremely easy to install.  Simply peel off the material while leaving the cutouts behind and stick onto the iPhone 4 surround.  If you mess up…simply pull it off and re-seat the material…just like you would when installing on anything else.\r\n

Apple iPhone 4 carbon fiber 3M DI-NOC bumper

\r\nNot only will it protect your iPhone in a sleek looking, low profile manner, but it helps give the phone a more blacked out look…which we personally love.  As we all know, carbon fiber is the new black (it’s our slogan).  These are priced at just $9.99 shipped, or $14.99 if you want 2-3 day Priority Mail.  You can order from our buddy Jason at CarbonBumper.com.  If you have any concern about the installation, simply watch the below video for an easy-to-follow overview:\r\n\r\n

\r\n\r\nIf you want to tackle making your own bumper, figuring out your own carbon fiber DI-NOC business, or want more material…simply purchase the raw material from us!  We have competitive pricing, a full selection of all the colors 3M makes the material in, we almost always have material in stock for immediate shipping, we ship extremely quickly and in a protective tube, and we offer the absolute hands-down best customer service you’ll find.  We have thousands of customers ranging from entrepreneurs such as Jason to vehicle wrap/aftermarket shops, to large aerospace companies to automotive manufactures to the regular consumer.

One Picture That Shows The Awesomeness of 3M Carbon Fiber DI-NOC

This one picture truly shows how amazing a material 3M’s carbon fiber DI-NOC is:\r\n\r\n

\r\n\r\nWhile we didn’t install this, you can see how well the material can conform to complex curves.  If you’re doing something along these lines, be sure to use 3M Primer94, which you can read more about in our FAQ.

DIY Guide: Carbon Fiber Vinyl for The HTC EVO 4G

This guide was written by one of our customers, Sterling.  Sterling offers installation services where you can mail your battery cover or phone to him and he will wrap it with DI-NOC.  At the time of this writing, he will do any phone for $20, including return S&H.  You can contact him at hrshycro [at] gmail.com.\r\n

What You’ll Need

\r\n

    \r\n

  • 4×6 inch piece of 3M DI-NOC (which you can of course order from us here at Carbon Fiber Film for just $8 shipped)
  • \r\n

  • X-acto knife with sharp blade
  • \r\n

  • Cutting surface
  • \r\n

  • Hair dryer
  • \r\n

  • About 30 minutes of time
  • \r\n

\r\n

DIY Steps

\r\n

    \r\n

  1. Order an $8 sample size from carbonfiberfilm.com, which includes free shipping.
  2. \r\n

  3. Find a piece of firm/thin cardboard (like the type from a cereal box), or other similar cutting surface.
  4. \r\n

  5. Remove the battery cover and set the phone aside.
  6. \r\n

  7. Make sure the battery cover is clean and free of any grease or dirt.
  8. \r\n

  9. Align the vinyl with the case, remove the backing and then place it on as smoothly as you can.  You can use a credit card to smooth any bubbles out, if needed.
  10. \r\n

  11. Turn the hair dryer on low and proceed to slowly and evenly heat the vinyl, whilst doing so, smooth it outwards with your thumb and down around all the edges.  If the heat is to hot for your hands, then it’s hot enough for the vinyl.
  12. \r\n

  13. Take your x-acto knife and use the battery case as your guide.  Go slowly and make sure of where you’re cutting before you cut, hopefully preventing any miscuts or scratches to the battery cover.  Rough cut any extra vinyl around the outer edges of battery cover from the back to the front.  Then, from the front to the back fine cut it to fit the edges of the battery cover.
  14. \r\n

  15. The camera and flash holes are pretty easy.  Start by cutting a smaller rough circle in them, then using the type of your blade, just follow the edges of the battery case holes trimming the excess away.  Use the same idea for the kick stand.
  16. \r\n

  17. After that, re-heat shrink it and make sure it’s sealed down good around all the edges.  Re-trim any excess.
  18. \r\n

  19. Punching the holes for the speaker is easy.  Just fine a sowing needle that’s just large enough to be pushed/pulled all the way though the larger holes.  Personally, I would just do the larger holes.  These may have to be redone down the road because pocket heat and normal usage seems to close some of them back up.
  20. \r\n

\r\n

HTC Evo 4G with carbon fiber DI-NOC vinyl installed on it

\r\n

HTC Evo 4G with carbon fiber DI-NOC vinyl installed on it

\r\n

HTC Evo 4G with carbon fiber DI-NOC vinyl installed on it

Need A Larger Size Than 10 Feet Long?

Even though we only list DI-NOC sizes up to 10ft x 4ft on our site, did you know that we can actually provide lengths all the way up to 164ft x 4ft? Whether you’re a shop looking to stock more material, or you need much longer lengths for your project, we’ve got you covered. Just give us a call at 443-270-1603, let us know the length you need, and we’ll let you know what we can do.\r\n\r\nTypically we base your length over 10 feet long on a $5.95 sq/ft pricing.  So if you need 15ft x 4ft, this is 60 sq/ft.  60 sq/ft times $5.95 is $357 for the material.  Sizes over half a roll (82ft x 4ft) will receive a break, and full rolls will get even better pricing.  Confused?  Simply give us a call, and we’ll explain everything to you to better clarify.

Protect Your DI-NOC From Scratches With 3M Tire Restore

While we don’t currently sell it, you can help protect your DI-NOC™ and minimize scratches by applying 3M™ Tire Restorer. The tire restorer works by adding a thin layer of silicone that acts as a top coat to DI-NOC™ without changing the vinyl’s appearance. You shouldn’t confuse this with a clear-coat, which will add a shininess to the material.\r\n

3M Tire Restorer

\r\nIf you’re installing DI-NOC™ in an area that may receive high traffic and/or abuse, this is a great way to help ensure the vinyl stays looking good over time.

Experimenting By Clear Coating DI-NOC

A couple weeks ago we made a post about how one of our customers clearcoated the vinyl.  We decided to do a little experimenting ourselves in order to try and get a great result.  What we found to work best was Valspar Clear Gloss Enamel, which you should be able to pick up at any local home improvement store:\r\n\r\nValspar clear coat used for 3M carbon fiber DI-NOC\r\n\r\nYou can see a few samples on the right-hand side of the above picture, here’s a closer shot followed by an explanation of the differences:\r\n\r\nDifferences in the number of layers of clear coat\r\n\r\nClear coat differences\r\n\r\nAs you can see, the piece on the left is DI-NOC as it comes with no clear coat.  The other two pieces were clear-coated, the middle has just one coat, while the right piece has three coats.  The pictures make it hard to show how it really looks in person because it’s highly dependent on the lighting.  You’ll need to take a look at the video below for a better idea.  We also tried doing another with five or six coats, but it starts to get a bit blotchy and fills into the texture.\r\n\r\nWe only tested on these sample pieces so we’re not sure how it will hold up over time or once installed.  Upon inspection it seems like it would be just fine.  With the three coats it starts to bend back a little (although it’s still bendable without issues), I would suggest clearcoating once the material is installed rather than before.  This may seem obvious, but I just want to make that apparent.  Make sure and mask off any areas prior to spraying that you don’t want cleared.\r\n\r\nFor spraying techniques take a look at the below video:\r\n\r\n

How One Customer Made His 3M Carbon Fiber DI-NOC Glossy

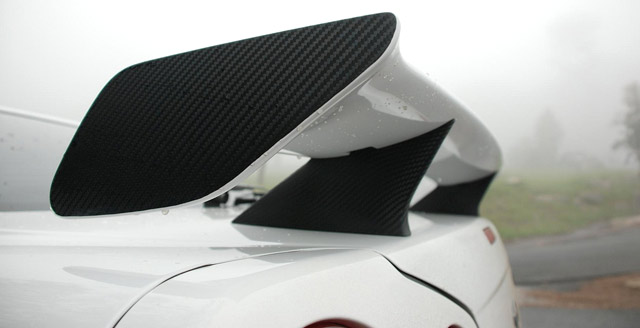
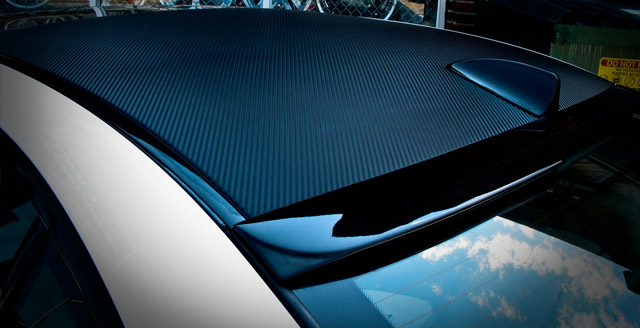
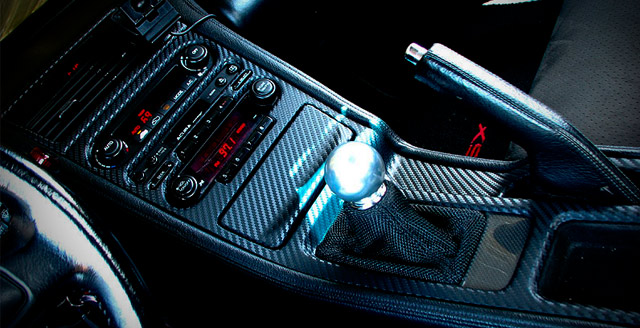
One of the questions we most frequently get asked is if the 3M DI-NOC material comes in a glossy version or if there is a way to make it glossy.  The answer to the first question is no.  3M only makes the material in a matte version which more resembles a dry carbon look versus a wet look.  The answer to the second question is potentially yes.  While we will be doing some testing here in the near future to see what kind of results we get, currently we can only go by what our customers are telling us.\r\n\r\nWhat we’ve heard is there have been two successful methods of making the material look glossy.\r\n

    \r\n

  1. The first is by covering the film with a clear film.  We don’t sell this film, but we’re assuming it’s the same type of stuff that is used to do a clear bra on a car.
  2. \r\n

  3. The second method is we’ve had customers clearcoat the material with no problems.
  4. \r\n

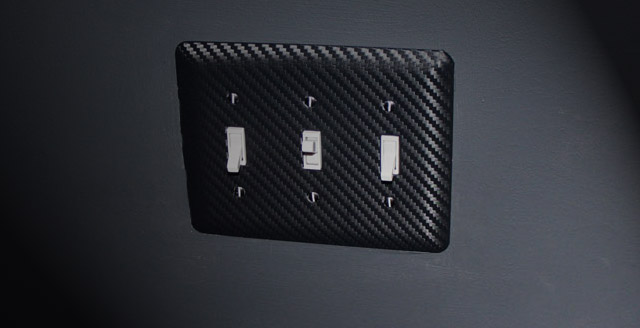
\r\nWith any method, we always recommend testing on a small piece prior to doing an entire piece.  This way you can see how the material reacts with whatever you’re doing, how well it adheres, etc.  If you’ve successfully done anything that makes the material glossy, be sure to send us pics and give us the details on what you did so we can share it with our readers.\r\n\r\nWe do have a little insight from one customer, Rick, who use Duplicolor Rattle – Can Clear to clear coat the material on a lightswitch panel.  Since the material has a texture we asked him if he had to sand it down at all and how that worked:\r\n

There’s about 4 heavy coats on the light switch and there’s still texture to it.  I think I’d have to add quite a bit more clear to get enough to cover up the texture.  I do plan on doing this though.  I just don’t know what I’m going to cover yet.

\r\nWe also asked him how well it adhered to the DI-NOC:\r\n

The clear adheres very well.  I didn’t do any prep at all except to brush off the part on my sleeve to get any big debris off.  Once you get some clear on it I’d compare to anything else that you would clear: Metal, plastic, etc.  I’d be that the part will be as strong and durable as anything else one might paint.

\r\nHe also spoke to how the material compared with the clear on it:\r\n

It’s gives it a completely different look.  When it’s uncleared the light really reflects off the contour and you can see the carbon fiber look from any angle.  When it’s cleared it gives it a much more subtle look.  From most angles it looks black, but you can tell somethings different about it.  Then when you catch it in the right light you can see the Carbon Fiber pattern.  So this stuff would work great cleared if you were going for that subtle look.  I tried to show this as best I could in the pictures I took, but it really has to be seen in person.

\r\nHere’s a couple pictures that you can see examples of how Rick’s clear coating experiment worked:\r\n\r\n

\r\n\r\n \r\n\r\nYou can see more of his pictures here.\r\n\r\nI think if we continue to test different methods, together the community can perfect the technique to make the material glossy.  Be sure to let us know if you try something out.

Video: How To Splice and Extend DI-NOC To Make It Wider

One of the complaints we’ve had with the 3M DI-NOC is that it only comes in a maximum width of 48 inces, or 4 feet. While it’s not possible to get wider material, there is a method called splicing which you can use to connect two pieces together while minimizing the seam in-between. In the below video we show you how best to use this method, as it’s very simple to do:\r\n\r\n

Measurement Conversion Chart For Our International Customers

We don’t all look at the same measurement formats, and we tend to get a lot of questions about what size if what in a different conversion. We went ahead and put together this measurement conversion chart which shows all of the sizes as well as what it is in sq/ft, feet, inches, yards, meters, and centimeters. We hope this helps! We’ve also added it to our FAQ where many other questions are also answered.

\r\n\r\n